How to Create a New Policy Set
As previously stated, Nirmata includes a number of highly recommended policies when leveraging either NPMK or the Full Nirmata Edition with the Kyverno add-in installed. However, more than likely organizations will find benefit in creating their own customized policies as well.
In order to facilitate this process, one would first need to establish their content within a Git repository. As a reminder, policies are configured in a yaml format.
So once a new policy Git repository is available, the process for creating custom Policy Set (referencing this repo) is very straight forward.
To create a New Policy Set:
- Go to Menu>Policies>Policy Sets. The Manage Policies page with the details of existing policy sets are displayed.
- Click the Add Policy Set button, located in the upper right corner. The “How would you like to create a policy set form” is displayed. In this page, you will see two options to create a policy set.
a) Git - Select this option to create a policy set from an existing git repository.
b) YAML - Select this option to create policy set by uploading the YAML files directly.
To create a Policy Set through Git:
-
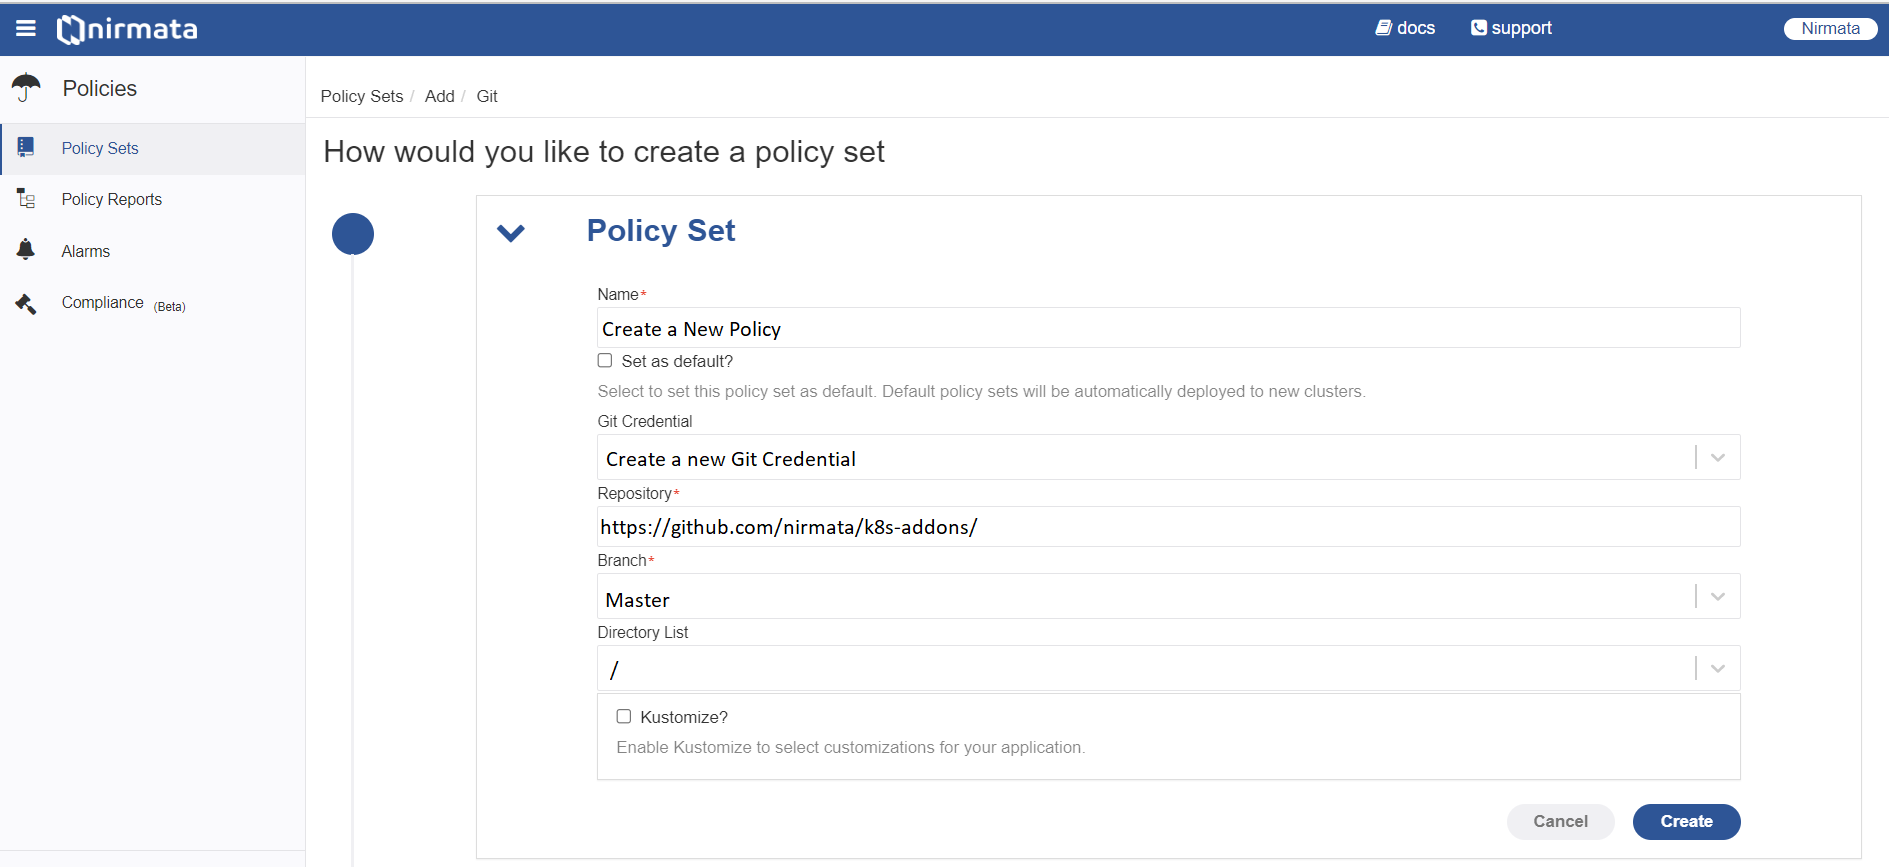
Click on Git option, a Policy Set form is displayed. In that form:
a) In the Name field, enter an unique name for the Policy Set. You can set this policy as default by clicking on the checkbox, Set as default.
 b) In the Git Credential field, click to add new credentials and add the following details
:
b) In the Git Credential field, click to add new credentials and add the following details
:Note: This step is required only if the user is not having any Git credential or the repository is private.
i) In the name field, enter the name as an unique identifier for the Git Credential.
ii) In the Credentials Type options, select either Username and Token or SSH by clicking the radio button.
iii) In the Username field, select the username for the Git Credential.
iv) In the Token Key field, enter an unique token key.
v) In the Advanced section, under Access Contol Policy, select the values for Type, Entity, and Access from the drop-down list. The options available for Type are Team and User, Entity are entiry names, and Access are Admin, Edit, and View. Select one of these options. An Admin will have both edit and view access.
vi) Click OK.
c) In the Repository field, enter the specific repository to be used.
d) In the Branch field, select the specific branch from the drop-down list.
e) In the Directory List field, select the desired directory list from the drop-down list.
f) To enable Kustomize for your application, select the Kustomize checkbox. This will enable you to select Fixed Kustomization or Target-based Kustomization. Select one of the options and choose the kustomization file from the drop-down list.
e) Click Create. Add cluster window is displayed with the list of avaialable clusters. -
Choose the cluster/s on which the policy set created needs to be deployed.
-
Click Add Clusters. A success message is displayed.
-
Click Done.

To create a Policy Set through YAML:
- Click on YAML option, a Policy Set form is displayed. In that form:
- In the Name field, enter an unique name for the Policy Set. You can set this policy as default by clicking on the checkbox, Set as default.
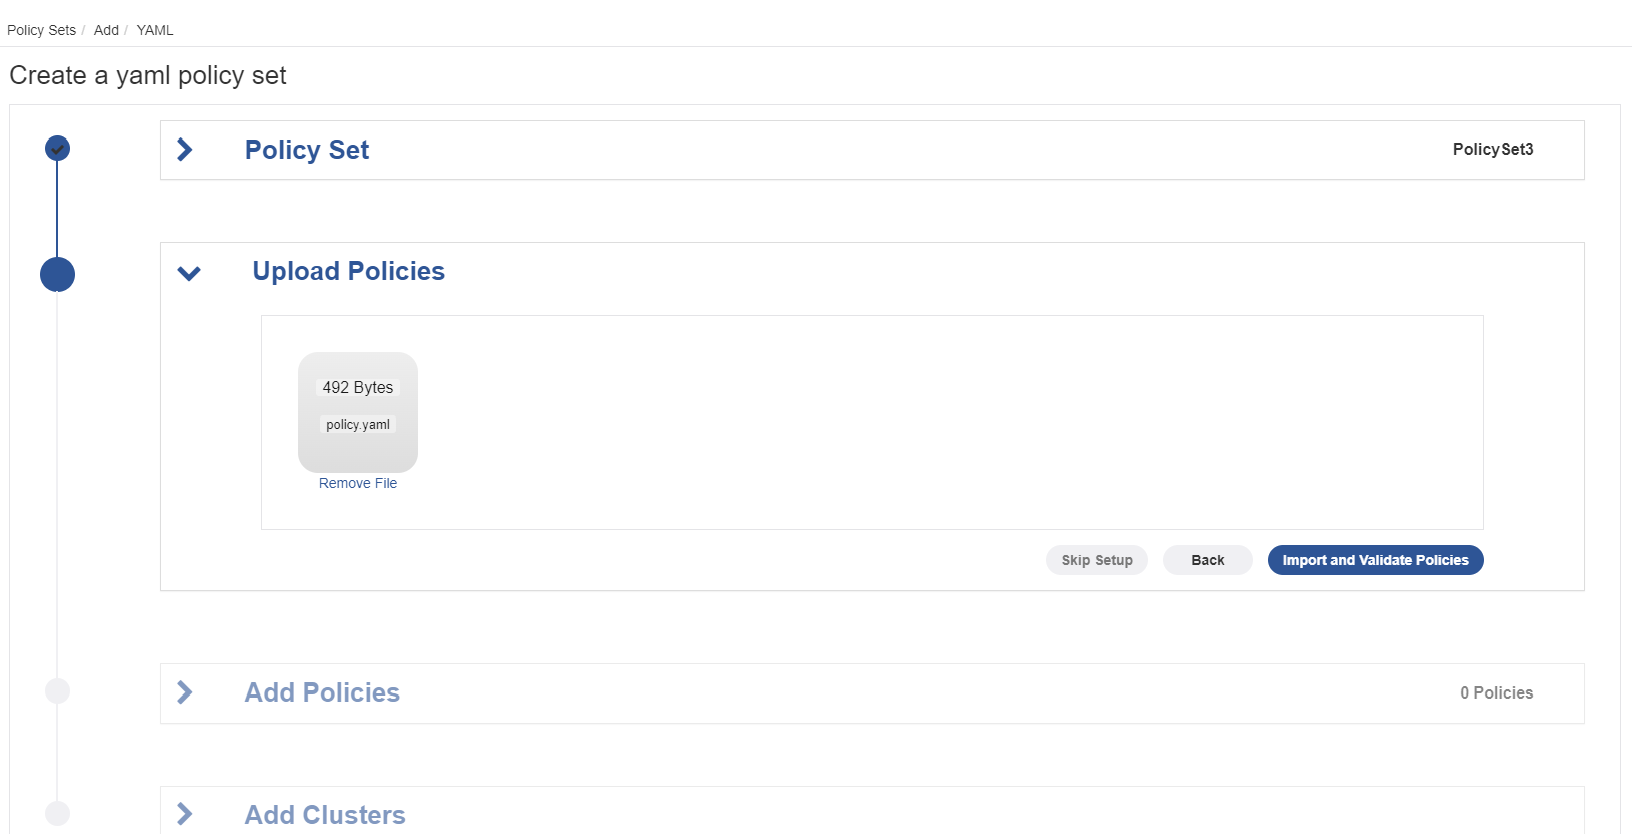
- Click Create. Upload Policies section opens.
- Click in the section to upload the YAML policy.

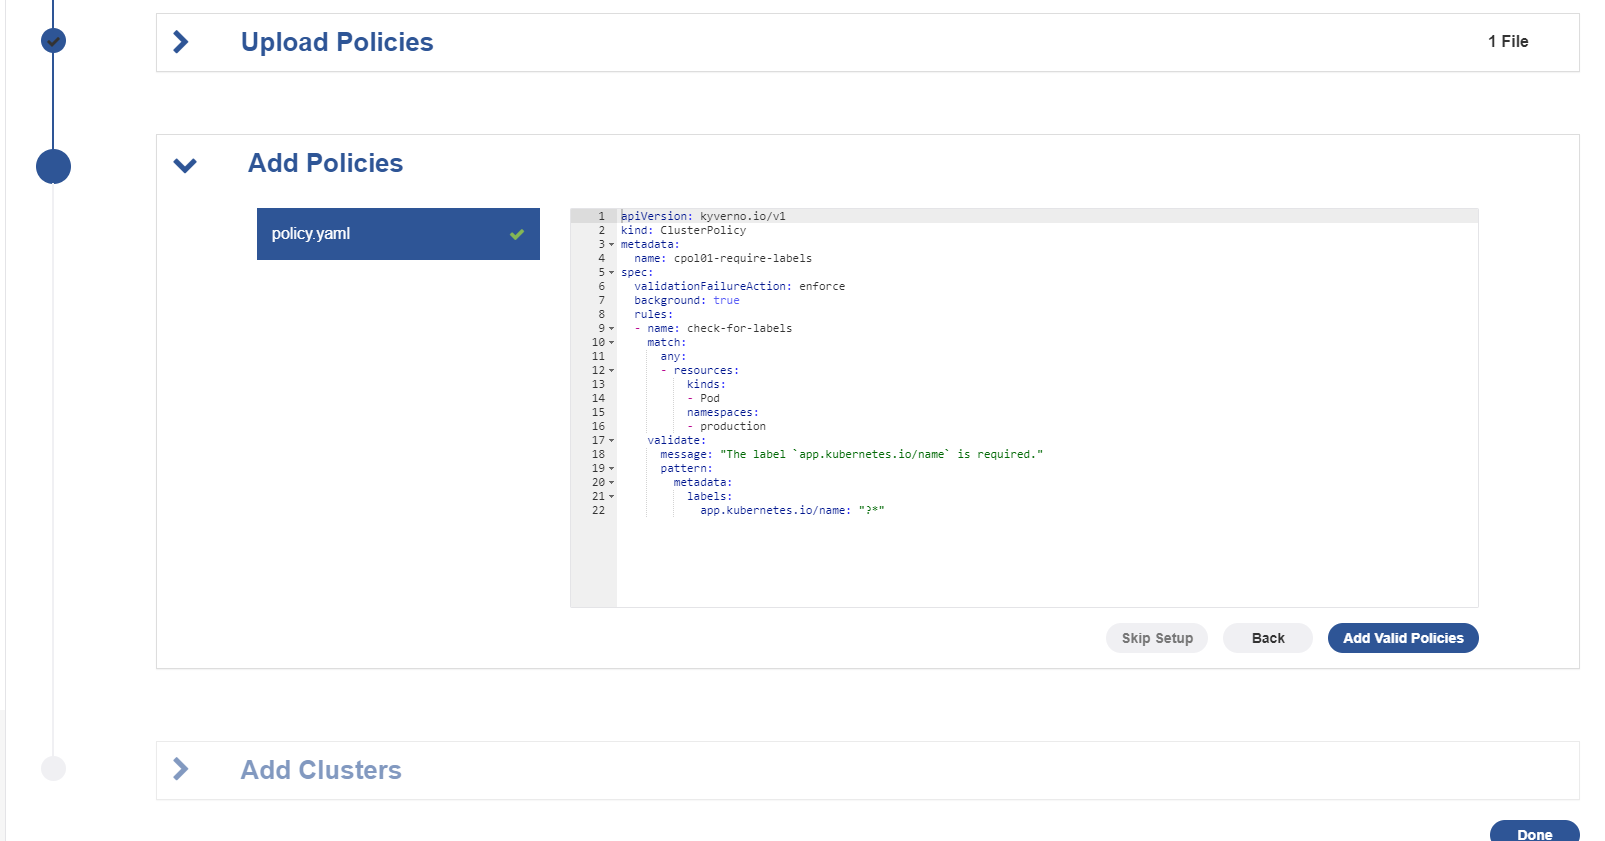
- Click on the Import and Validate Policies button. The Add Policies section opens. Here, the policy added is validated and mentioned with a check mark if it passes the validation.

- Click Add Valid Policies.Add clusters window is displayed with the list of avaialable clusters.
- Choose the cluster on which the policy set created needs to be deployed.
- Click Add Clusters. A success message is displayed.
- Click Done.
