The Integrations section in Settings is allows integration of the Nirmata platform to third-party applications like Git, Vault, and Jira.
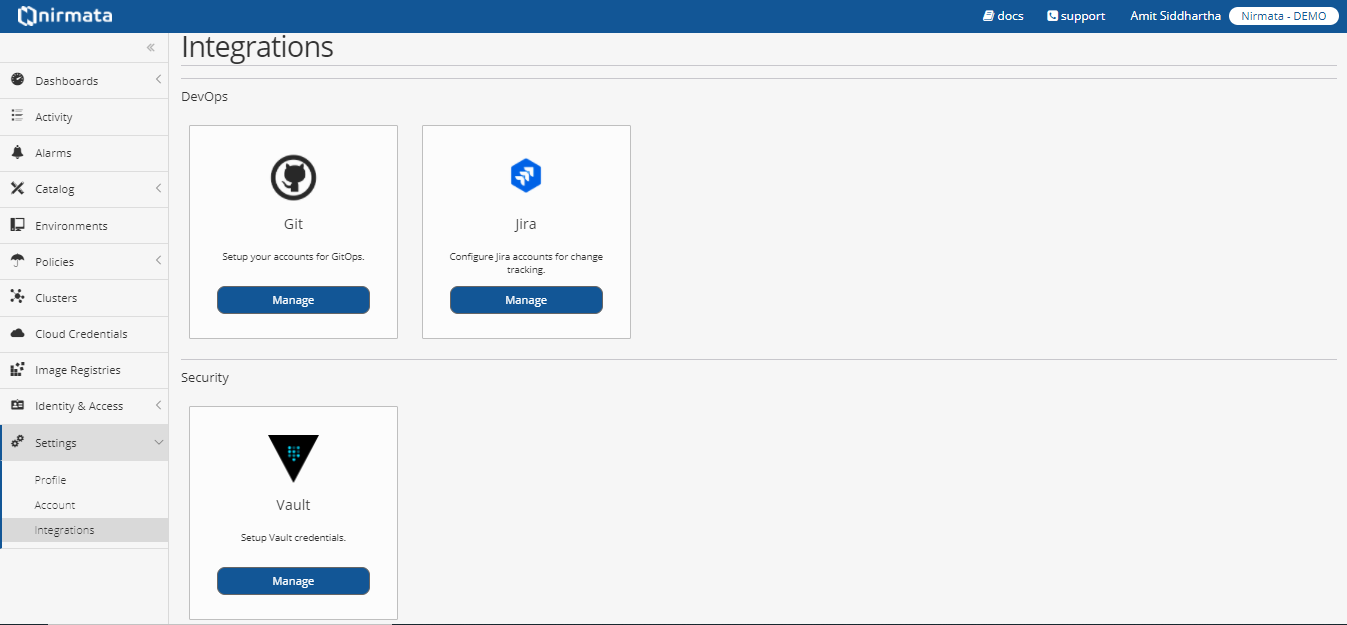
Git
The Nirmata users can integrate Git to set up the accounts for GitOps. To configure the Git, the user needs to add the following Git details.
-
Name - A unique identifier for the Git Credential.
-
Username - Git username.
-
Password/ Key - Git password.
NOTE: You can add Access Controls to restrict access to Git Credentials.
Vault
The Nirmata can integrate the Vault security system by setting up the Vault credentials. To configure Vault credentials:
-
Click Add Vault Credentials.
-
Enter the following Vault credentials to add the Vault security configuration, and click OK.
-
Name
-
Address
-
Access Token
Jira
Nirmata’s Jira Change Management integration allows automatic tracking of application changes in Jira.
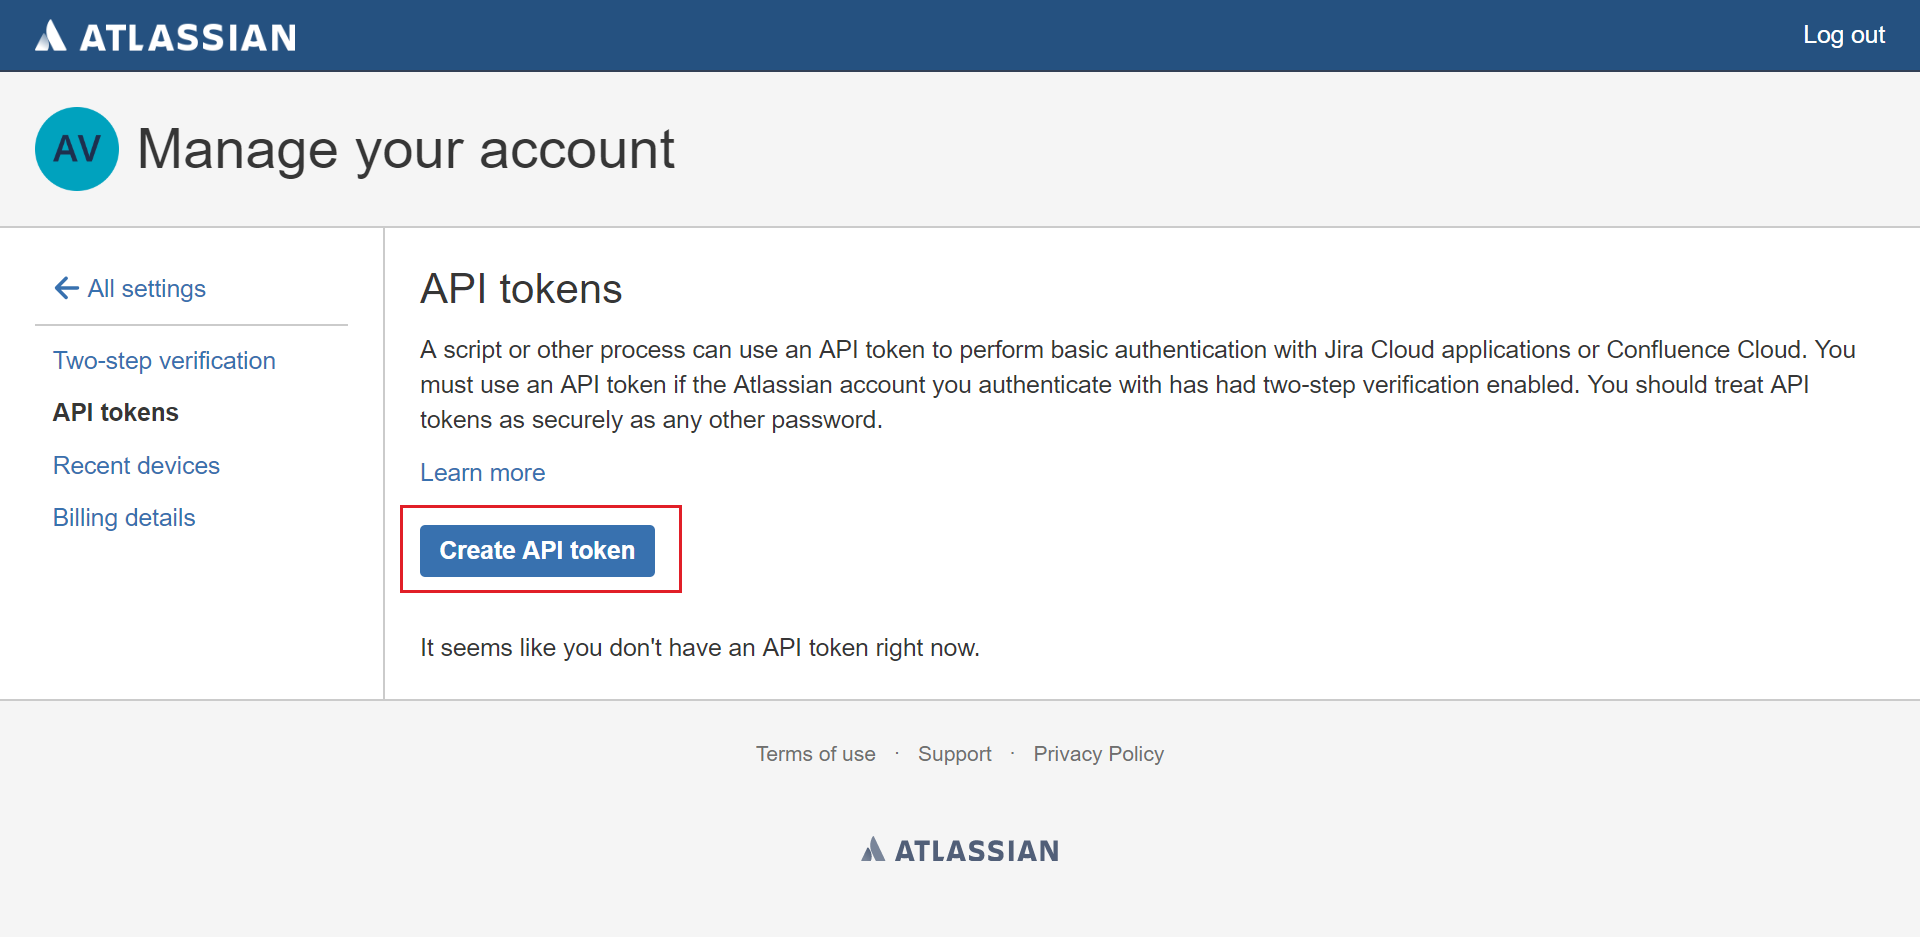
To start, generate a Jira API token by visiting id.atlassian.com.
Login to your account, select Security and then Create and Manage API token. Then select Create API Token. Copy the API token.
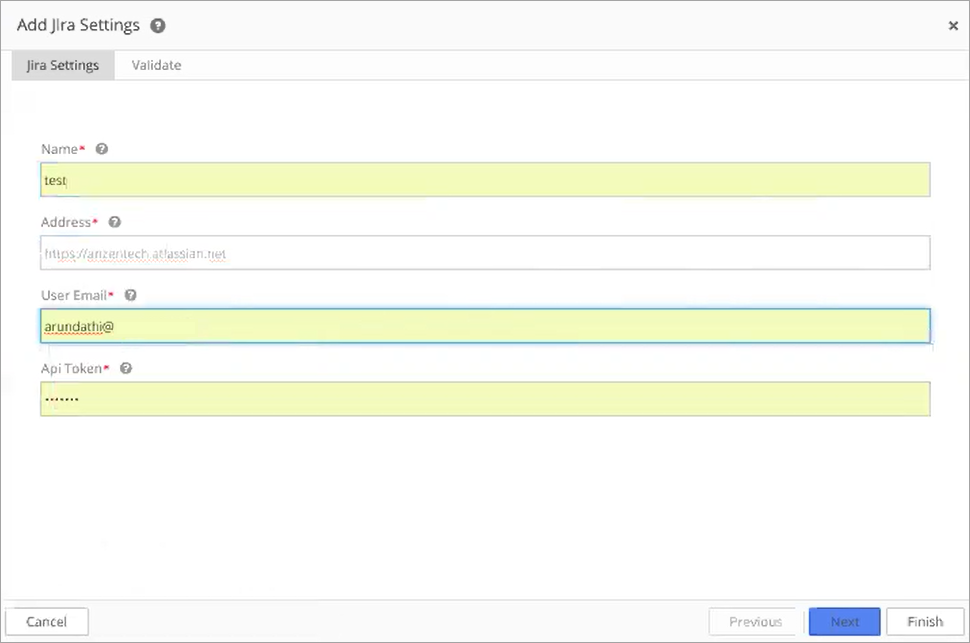
From the side bar menu in Nirmata, navigate to Settings and then select Jira Settings.
Apply a name to the new Jira settings and add the site URL, the Jira users' email and API token and click Next. After the account is validated, click Finish.
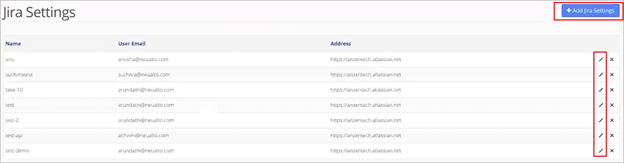
The new configuration credentials are displayed in the Jira Settings list.
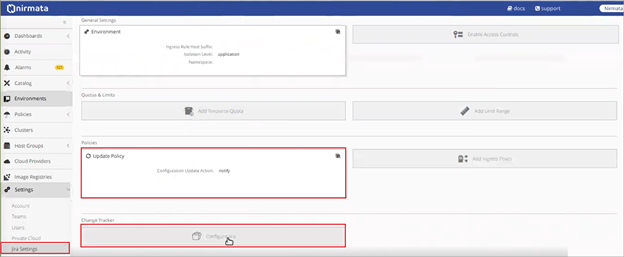
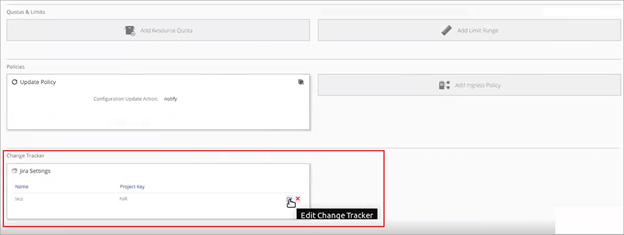
To make changes trackable in the application, set the Environment Update Policy to Notify and then configure Jira as the Change Tracker. Select the appropriate Jira setting, enter a Project Key, and select a Priority.
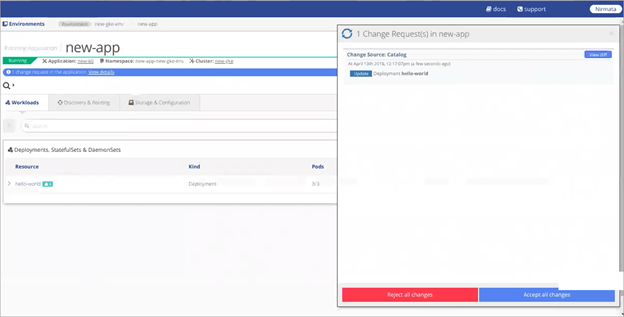
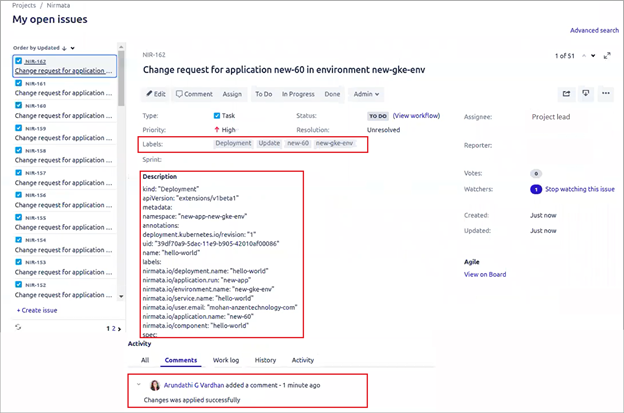
When a change is made to the application, a Change Request is generated in Nirmata. When the request is accepted, a Jira ticket is created in the configured account.
The Jira ticket is assigned to the project lead. The difference YAML and change ID are noted in the description. The ticket is labeled with the kind of YAML, the type of operation, the application name, and the environment name.
A note in the Comments section captures the status of the change.
How to Edit Jira Settings
The Jira Project Key and Priority Type can be modified from the Environment.
New credentials and API tokens must be modified from the global Jira Settings. When a global Jira Setting is modified, every Environment that contains the setting is updated with the new information.
The Nirmata users can also choose to configure the Jira Change Management and allow users to change an application and automatically track Jira’s changes in Jira. To configure and integrate Jira, the user needs to add the following details:
-
Click Create the Jira Settings or Add Jira Settings.
-
Enter the following Jira account details Name, Address, Username / Email, and Password.
-
Select the Accept All Certificates checkbox if you want to add the certificates.
-
Click Next.
-
Enter Project Key*, **Priority Type ID**, Issue Type Id**, and click **Next**.
-
Add Access Control Policy and click Finish.