Nirmata requires read-only access to EC2 service if using ASGs or Spot Fleet Requests and full access to EC2 service if using Launch Configuration to provision your VMs. The secure way to provide access is by configuring an Assume IAM role for Nirmata in your AWS account. To configure a role, you will need the Nirmata AWS account ID and an unique external ID. When the role is configured, you provide Nirmata the role ARN (Amazon Resource Name).
For the Nirmata Cloud Edition, there are two ways to provide secure access - using AWS Assume IAM Role or using User with right policies and permissions. You can configure either option in your cloud credentials configuration. Nirmata Private Edition will need User configuration unless deployed in AWS cloud.
AWS Assume IAM Role
To configure an IAM role in AWS:
- Navigate to Cloud Credentials and click +Add Cloud Credentials. The Add Cloud Credentials screen appears.
- Enter a name for your cloud credential and select Amazon Web Services from type dropdown.
- (Optional) Enter description for this cloud credential.
- Click Next.
- Under Settings tab, select a default region from Default Region dropdown. The Settings tab displays the Nirmata Account ID and External ID.
- Login to your AWS account and navigate to Identity & Access Management.
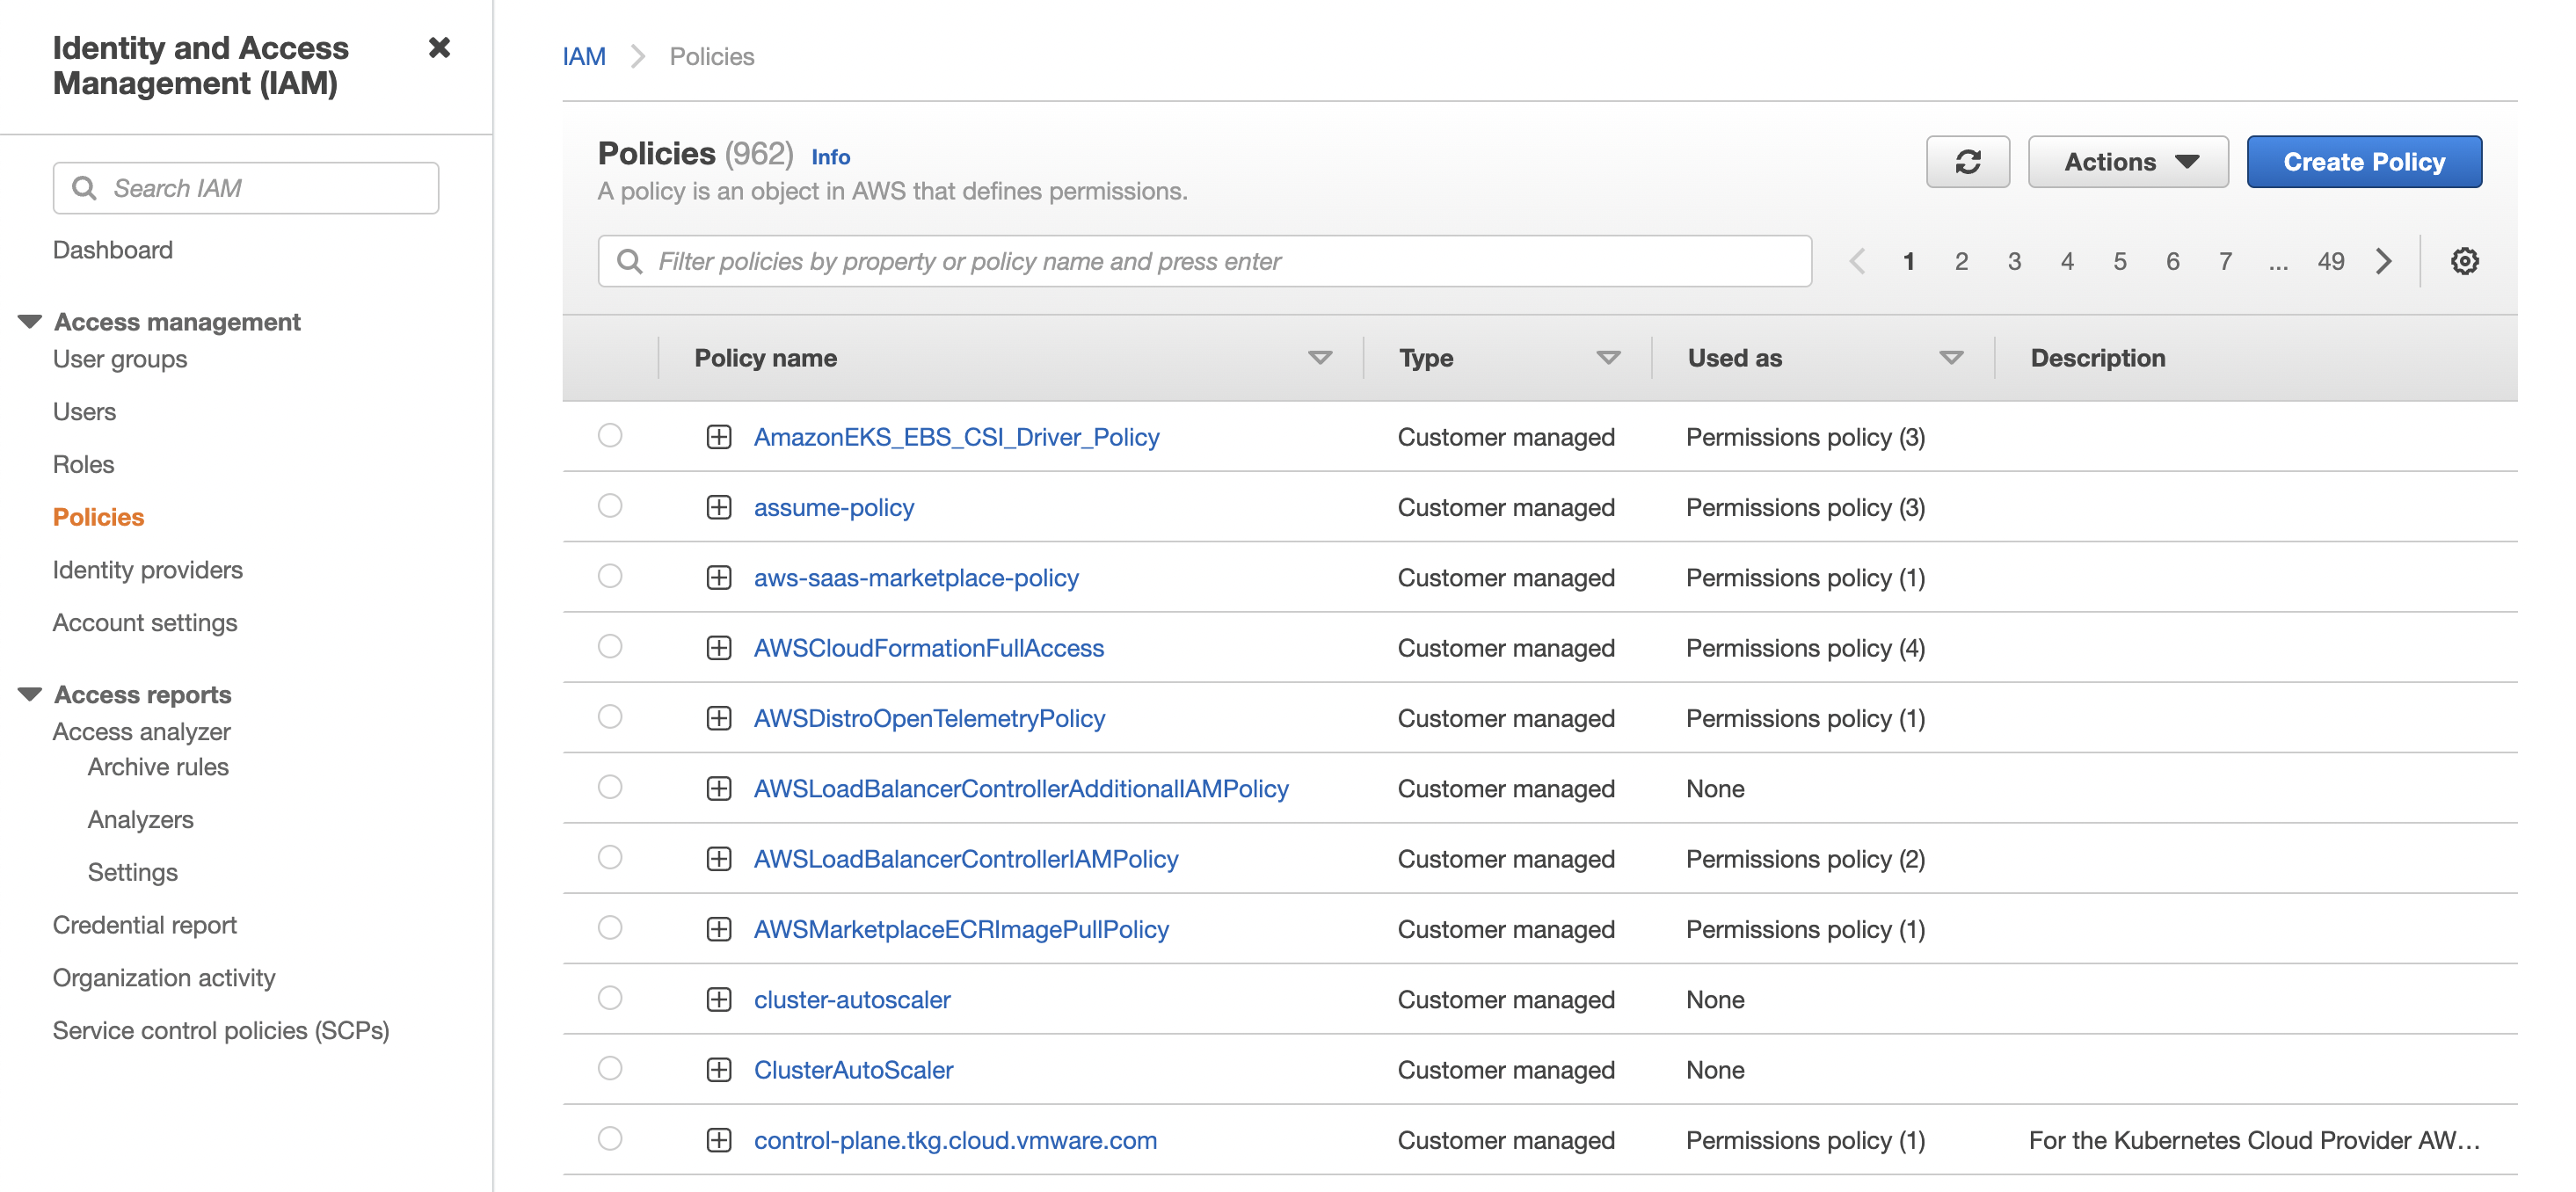
- From left side bar, click Policies and Click Create Policy.
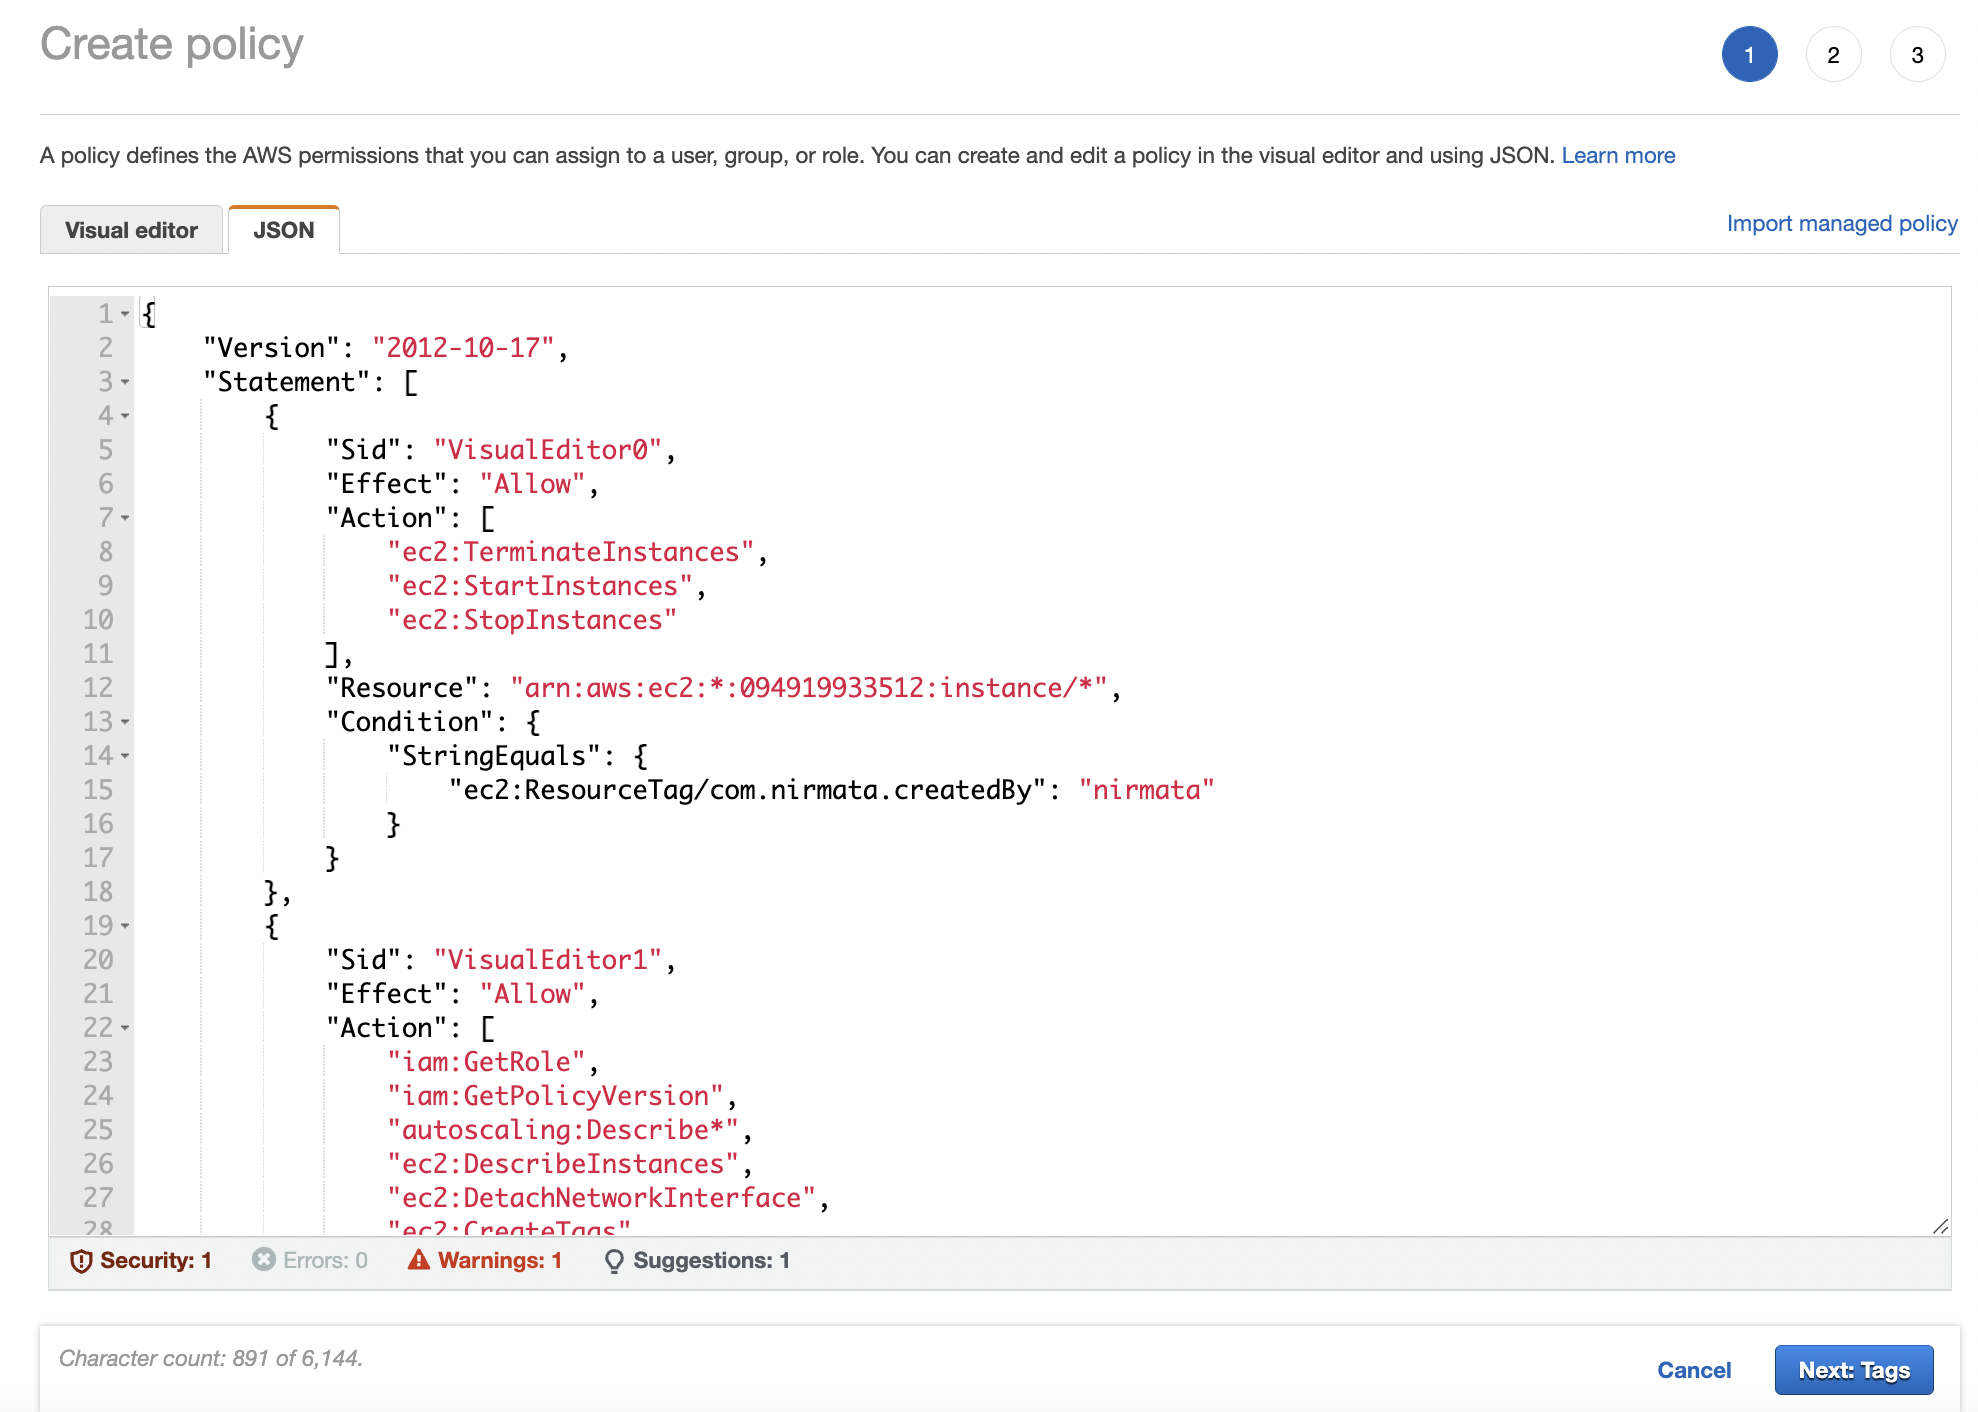
- Click on JSON and Pass the Json policy mentioned below.
{
    "Version": "2012-10-17",
    "Statement": [
        {
            "Sid": "VisualEditor0",
            "Effect": "Allow",
            "Action": [
                "ec2:TerminateInstances",
                "ec2:StartInstances",
                "ec2:StopInstances"
            ],
            "Resource": "arn:aws:ec2:*:<account number>:instance/*",
            "Condition": {
                "StringEquals": {
                    "ec2:ResourceTag/com.nirmata.createdBy": "nirmata"
                }
            }
        },
        {
            "Sid": "VisualEditor1",
            "Effect": "Allow",
            "Action": [
                "autoscaling:Describe*",
                "iam:List*",
                "iam:Get*",
                "iam:PutRolePolicy",
                "iam:DeleteRolePolicy",
                "iam:GetPolicyVersion",
                "iam:CreateRole",
                "iam:DeleteRole",
                "iam:ListInstanceProfiles",
                "iam:PassRole",
                "iam:SimulateCustomPolicy",
                "iam:CreateServiceLinkedRole",
                "iam:ListPolicyVersions",
                "iam:ListAttachedRolePolicies",
                "iam:CreatePolicy",
                "iam:DeletePolicy",
                "iam:AttachRolePolicy",
                "iam:DetachRolePolicy",
                "iam:TagRole",
                "iam:UntagRole",
                "iam:TagPolicy",
                "iam:UntagPolicy",
                "ec2:DescribeInstances",
                "ec2:DetachNetworkInterface",
                "ec2:CreateTags",
                "ec2:ModifyNetworkInterfaceAttribute",
                "ec2:DeleteNetworkInterface",
                "ec2:RunInstances",
                "ec2:AssignPrivateIpAddresses",
                "tag:TagResources",
                "ec2:CreateNetworkInterface",
                "ec2:Describe*",
                "ec2:DescribeNetworkInterfaces",
                "ec2:AttachNetworkInterface",
                "eks:*",
                "kms:DescribeKey",
                "iam:UntagOpenIDConnectProvider",
                "iam:AddClientIDToOpenIDConnectProvider",
                "iam:TagOpenIDConnectProvider",
                "iam:CreateOpenIDConnectProvider",
                "iam:DeleteOpenIDConnectProvider",
                "iam:RemoveClientIDFromOpenIDConnectProvider"
            ],
            "Resource": "*"
        },
        {
            "Sid": "VisualEditor2",
            "Effect": "Allow",
            "Action": [
                "cloudformation:CreateStack",
                "cloudformation:DeleteStack",
                "cloudformation:CreateChangeSet",
                "cloudformation:UpdateStack",
                "cloudformation:ExecuteChangeSet",
                "cloudformation:Describe*",
                "cloudformation:EstimateTemplateCost",
                "cloudformation:Get*",
                "cloudformation:List*",
                "cloudformation:ValidateTemplate",
                "cloudformation:DetectStackDrift",
                "cloudformation:DetectStackResourceDrift"
            ],
            "Resource": "*"
        }
    ]
}
NOTE:
- Ensure you provide nirmata’s AWS account number, you can find it in Nirmata Cloud Credentials
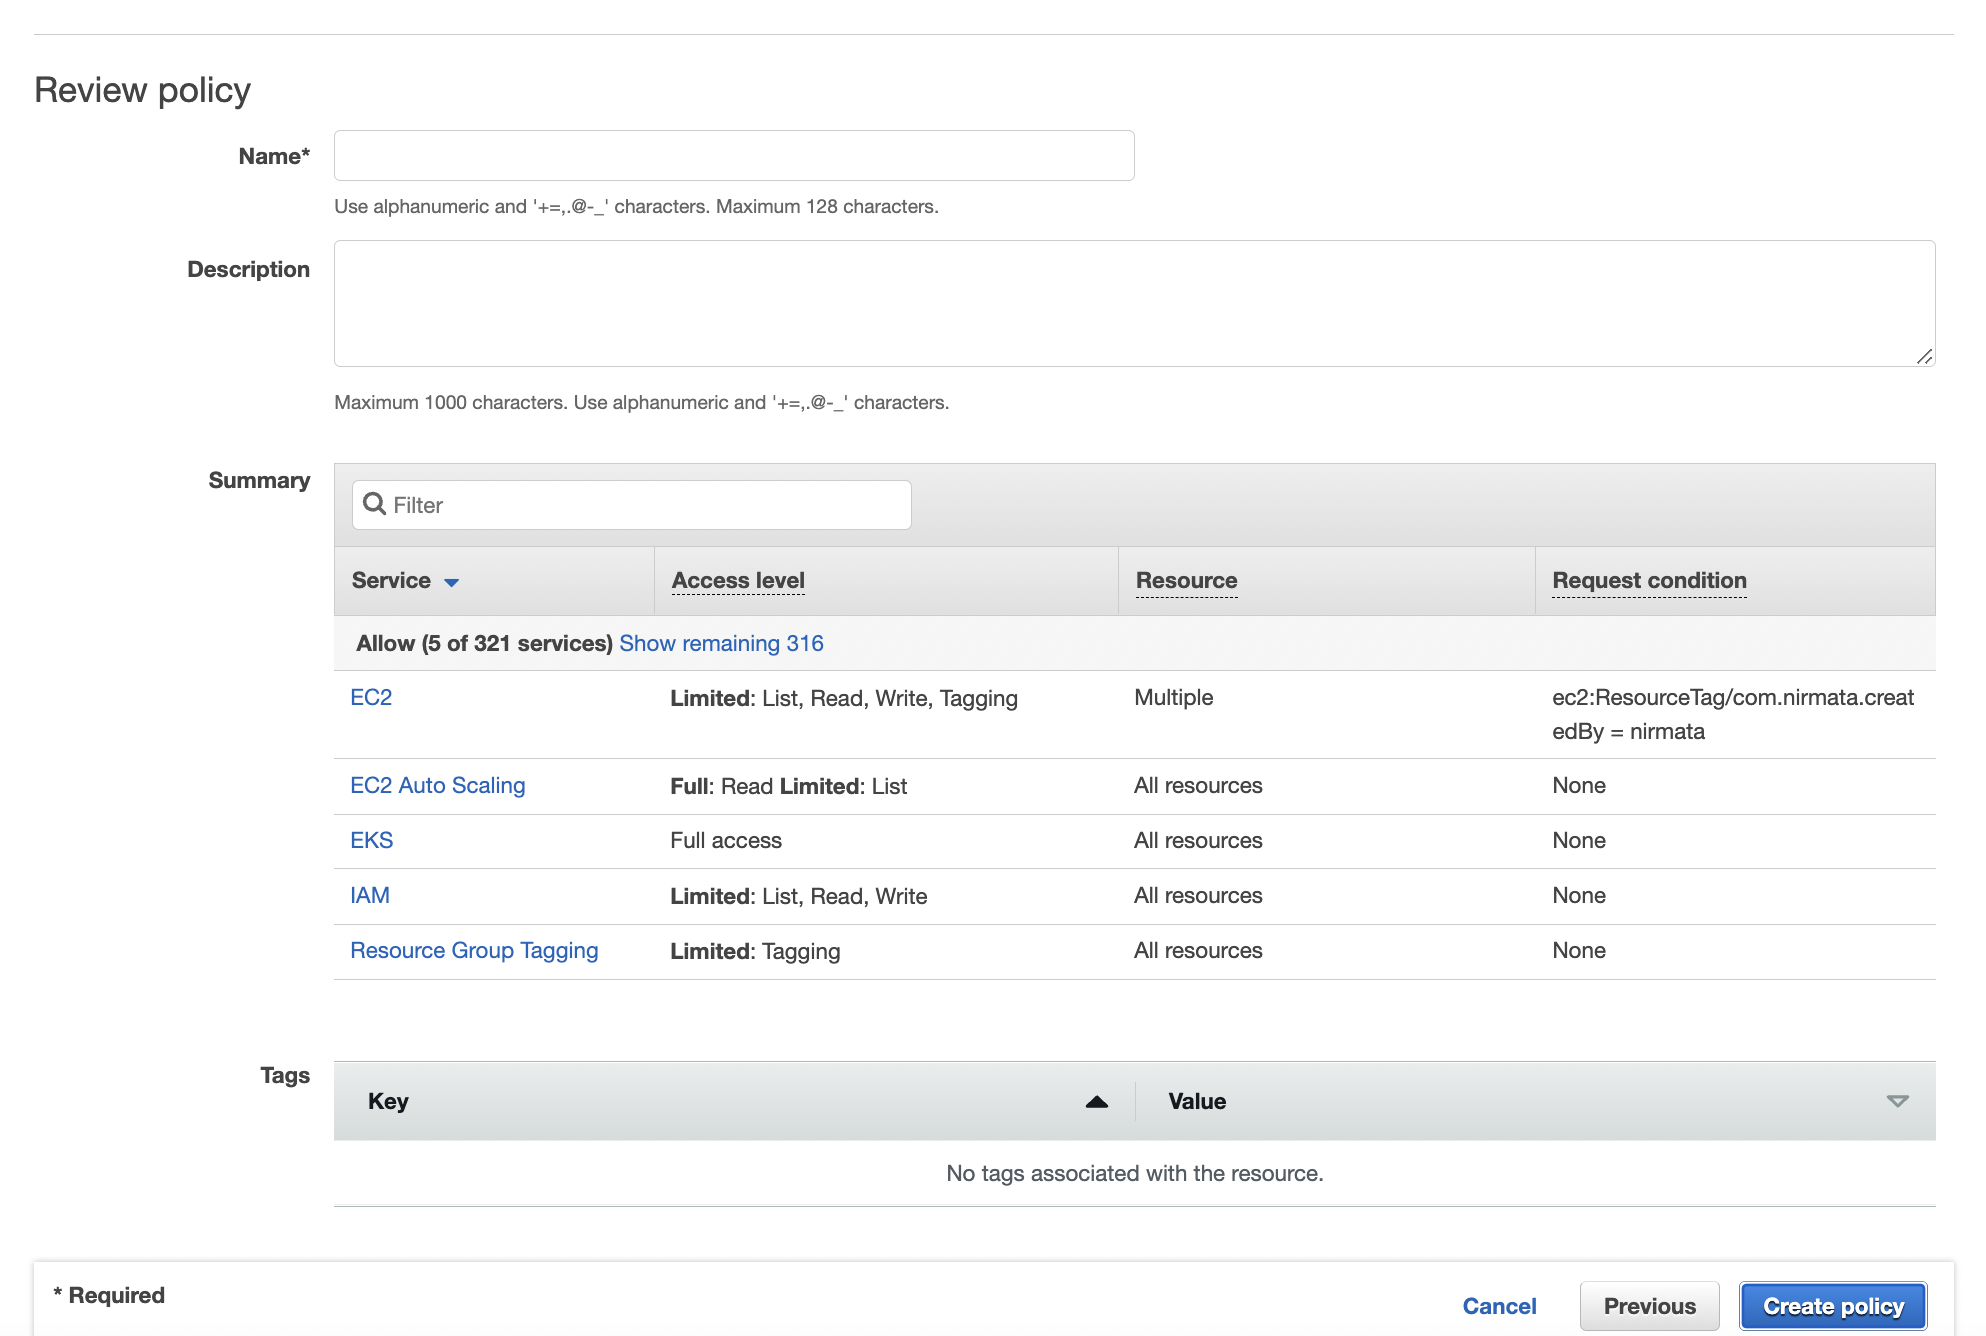
- Click on Next:Tags. Add a tag and Click on Next:Review
- Provide Name, Description(Optional) and Click on Create Policy.
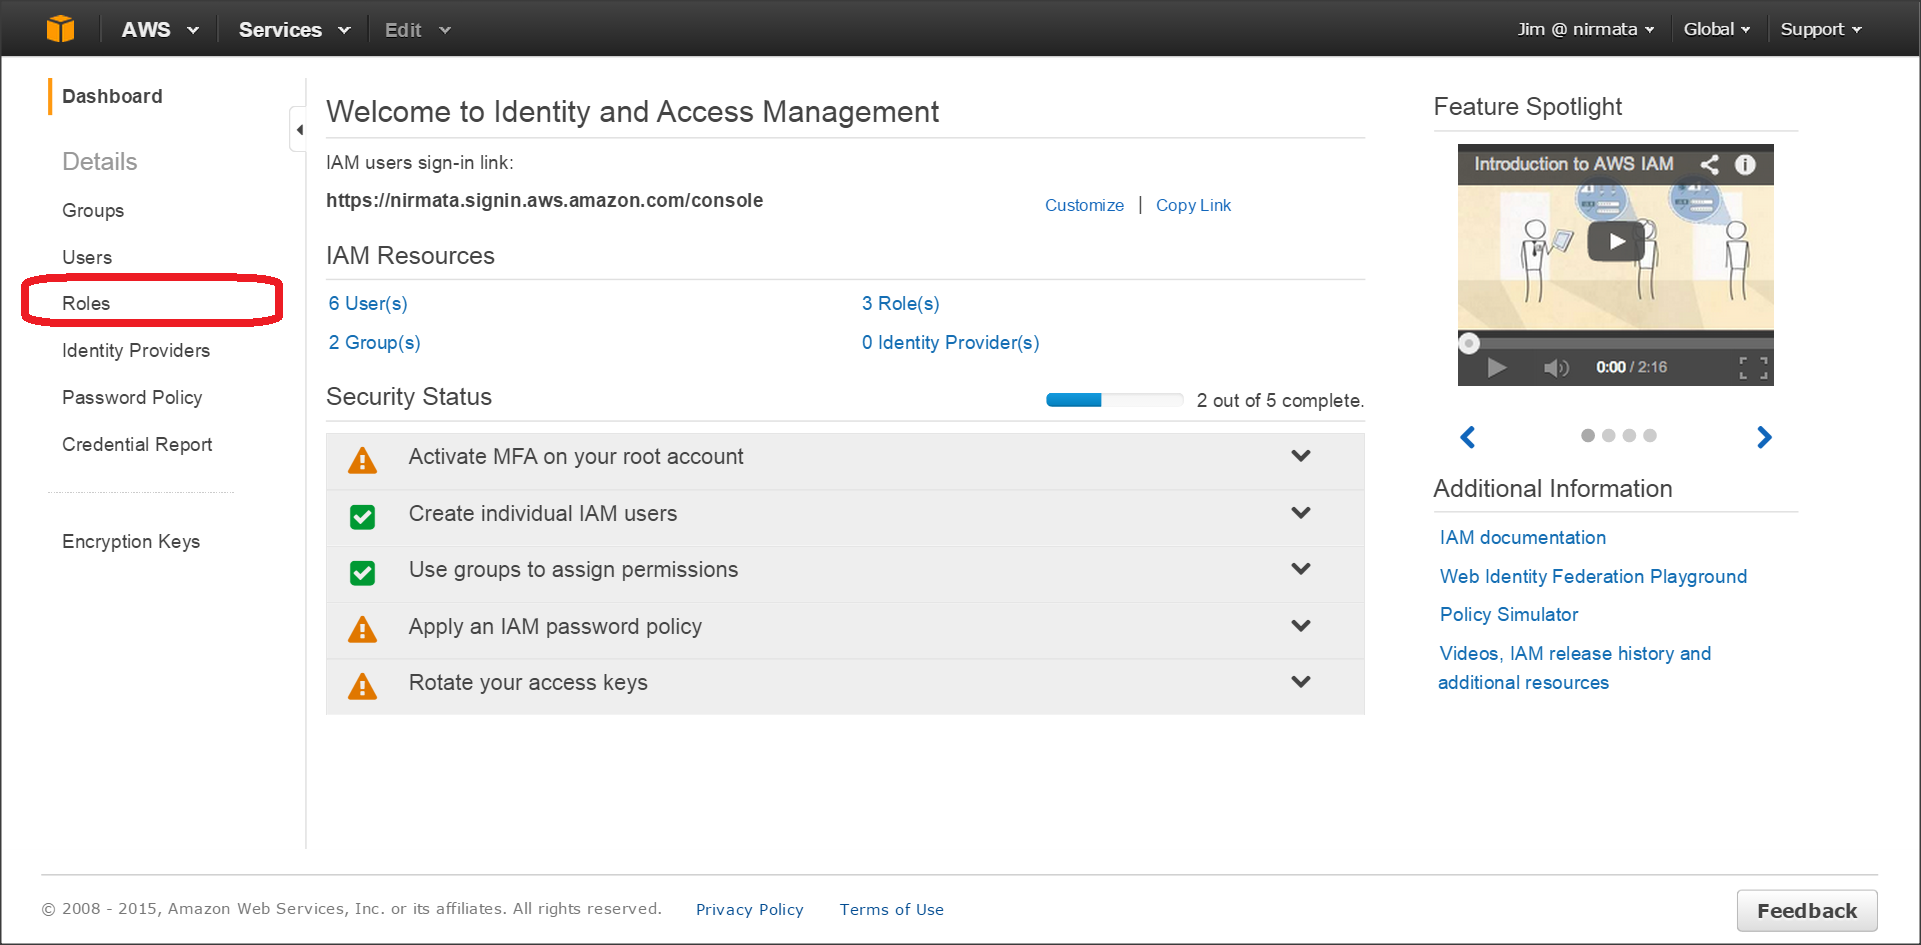
- Create a Role by Navigating to the left sidebar in IAM console, click Roles.
- Click Create New Roles.
- Click Another AWS account and enter the Nirmata Account ID and External ID.
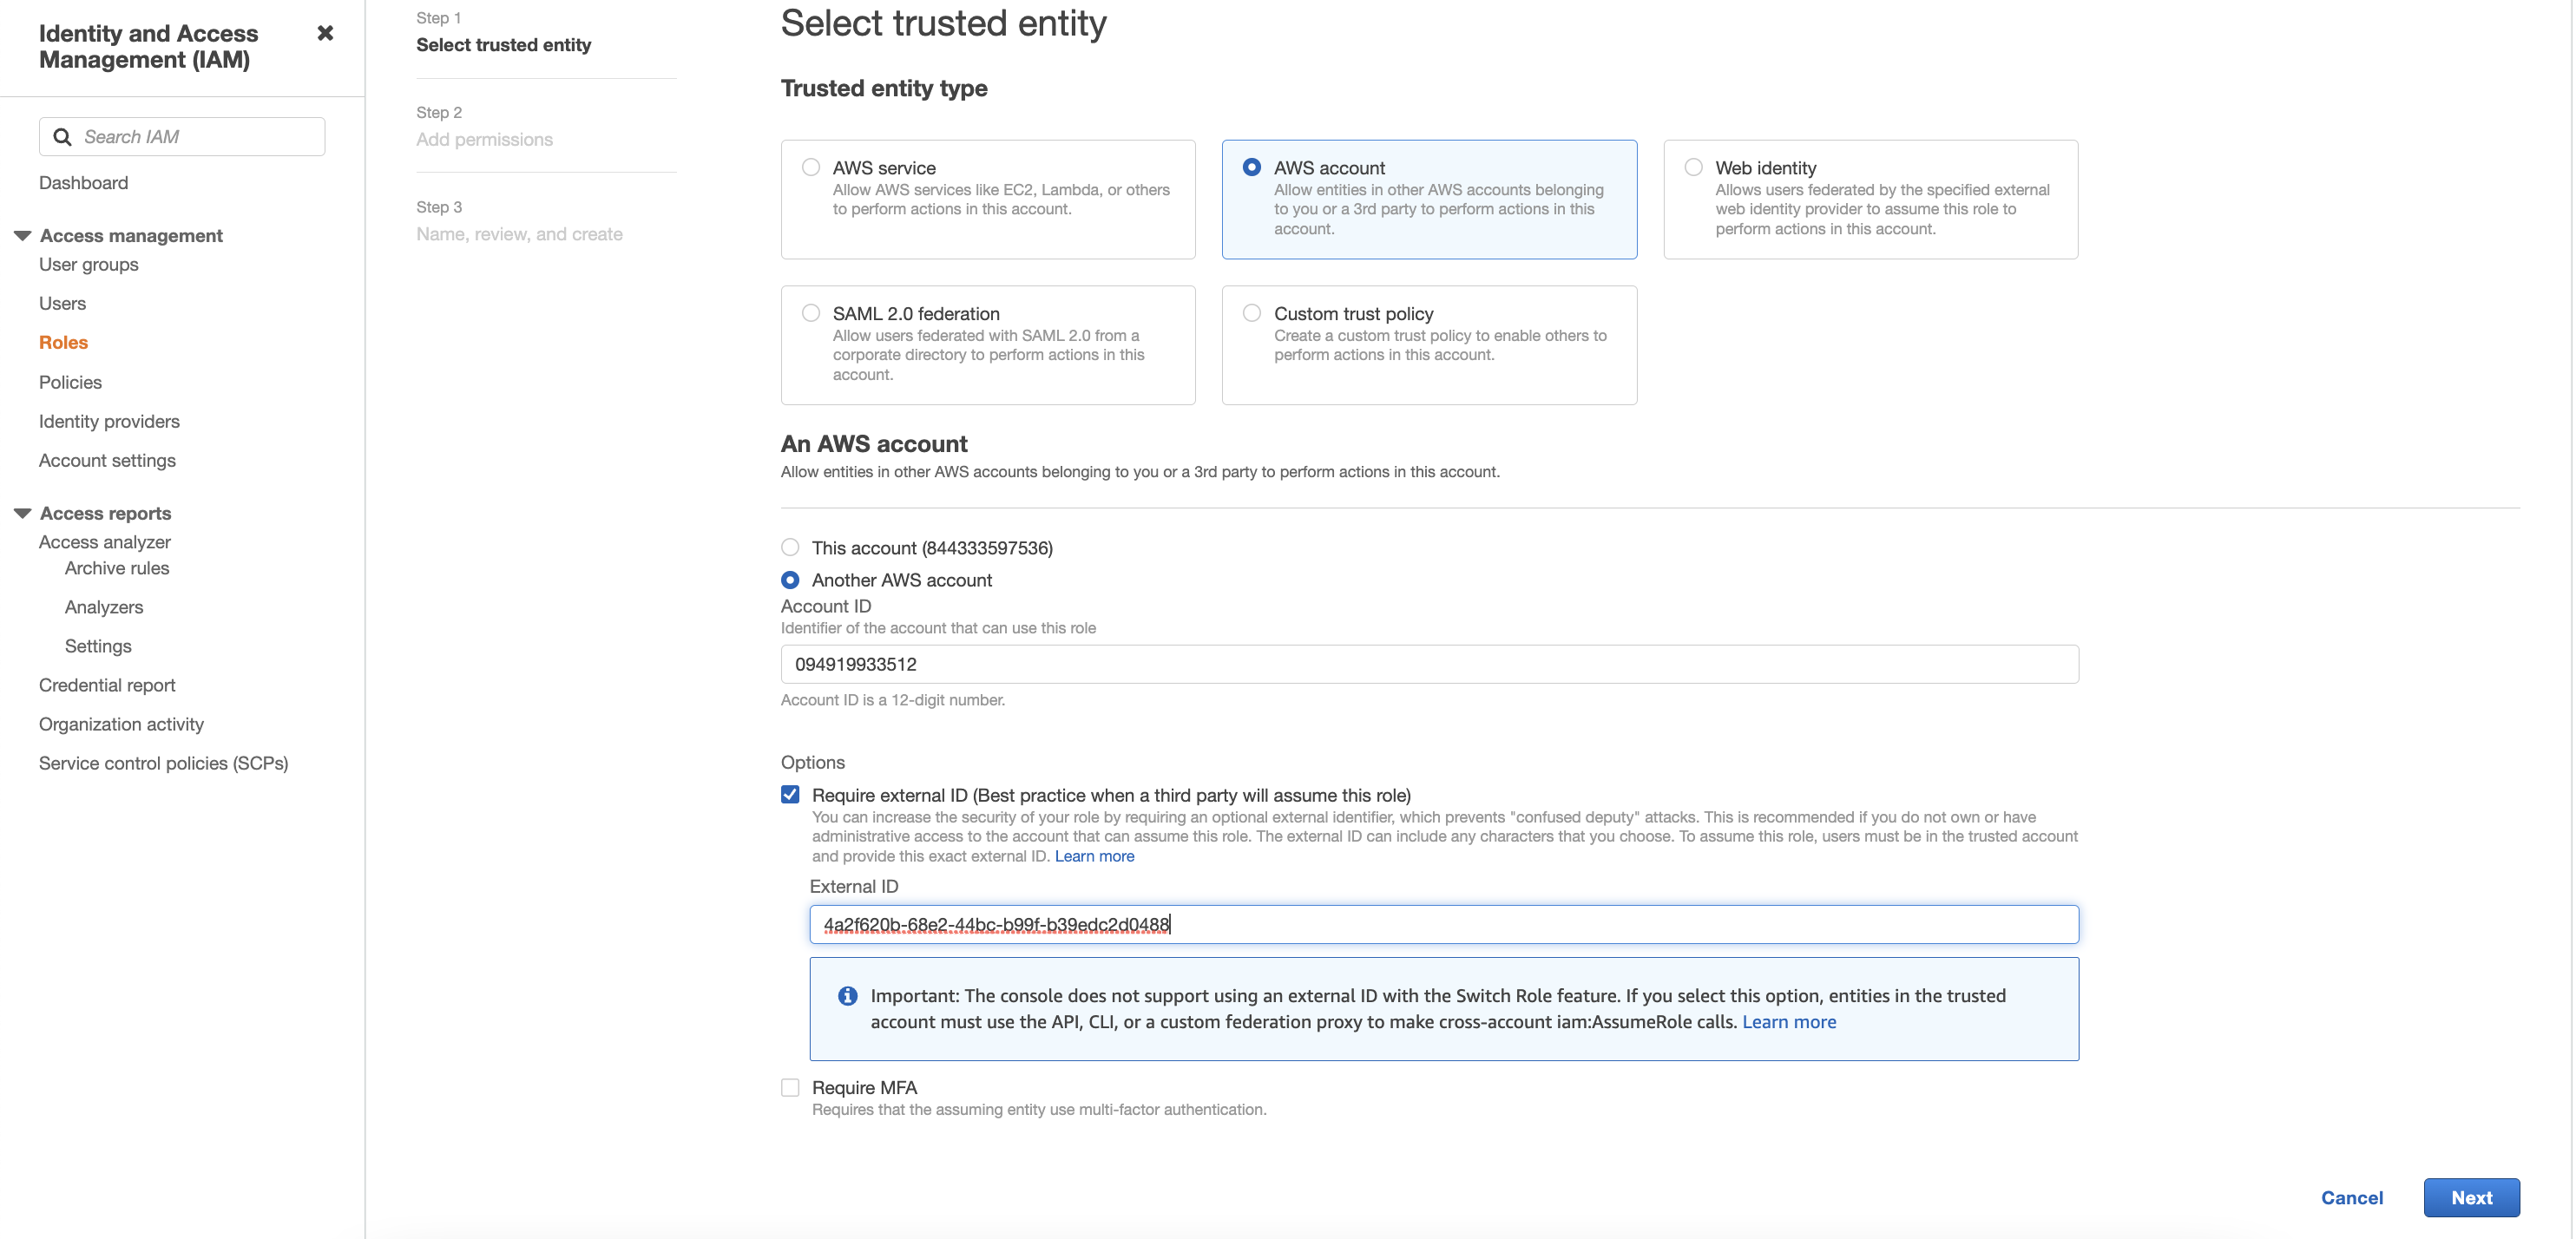
NOTE:
Ensure you copy the External ID from Nirmata cloud credential screen and provide here.
External ID updates every time, +add cloud credential is clicked. Do not close the session while creating a Role.
- Click Next:Permissions. The Attach permission policy screen displays.
- Attach NirmataAutomationPolicy(created above) and click Next:Review.
- Enter a role name and role description for the current role.
- Click Create role to create a AWS Assume IAM role.
To view the Role ARN, Navigate to the Roles page and select the required role.
- Navigate to Nirmata give Cluster Role ARN and Click on Finish.
Once validation is Completed, We are ready to move forward with next steps
Next Step: Setup an Nirmata Managed Cluster .