To add Google Compute Engine (GCE) as the type in Nirmata, add the Service Account Key.
Locating GCE Service Account Key
You must have a Service Account Key to add a Google Compute Engine (GCE) as a Cloud Provider in Nirmata. A GCE service account key allows external services to communicate with GCE.
The service account must be configured with the following permissions:
- Compute Admin
- Compute Network Viewer
- Kubernetes Engine Admin
- Service Account User
- Storage Object Viewer
To configure permissions for a service account, go to ‘IAM & Admin’ panel and select ‘IAM’ and there you will the permissions for different member and service accounts. Here you can add the necessary permissions.
To locate a Service Account Key:
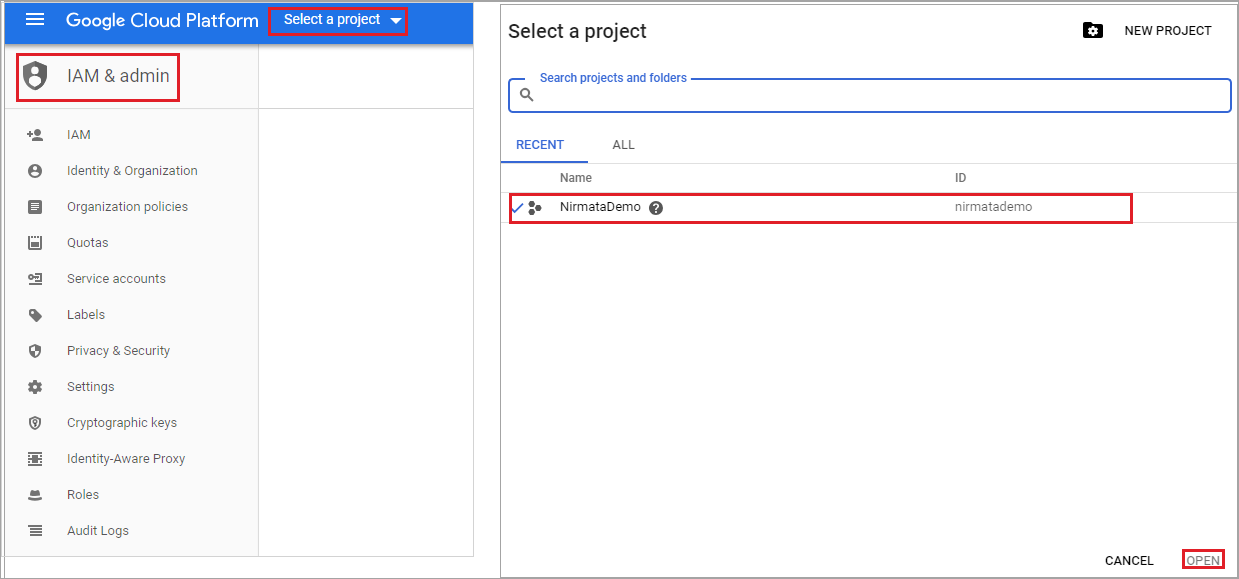
- Login to GCP Console and open IAM & admin.
- Select a project from the drop down menu and click Open.

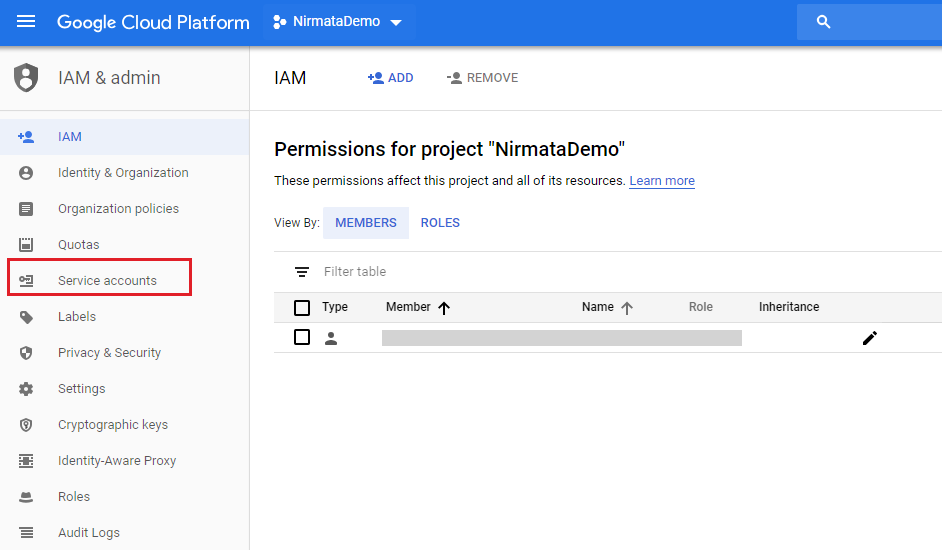
- Select Service Accounts from the left sidebar menu.

- Locate the service account, click the More more_vert button in that row, and then click Create.
- Select the Key Type and click Create.
NOTE: The
privateKeyDatareturned is a base64-encoded string representation of the JSON or P12 key/credentials.
- Save the JSON file in a secure and accessible location.
Creating GCP Credentials in Nirmata
To create a GCP credential in Nirmata:
- Select Cloud Credentials tab from the sidebar menu.
- Select +Add Cloud Provider from the top right corner.
- Enter a name for the GCP Cloud Credentials.
- Select Google Cloud Platform from the type dropdown.
- Click Next.
- Under Settings tab, drag-drop the GCP Service Account Key JSON file.
Alternatively, you can also click the provided space and locate the service account key from your local directory.
- Click Next. This screen validates your GCP credentials in Nirmata.
- Click Finish.
Your GCP Credential is configured when the Validate screen displays Success status.
Once the GCP account access is validated, setup a Google Cloud Host Groups or create a Cluster Type .
See Also: